Alhambra Wood Flooring provides hardwood floor repair in Alhambra, CA, serving surrounding cities including South Pasadena, San Gabriel, Monterey Park, San Marino and Rosemead. With more than 20 years spent on wood floors, we fix the specific boards and areas that have failed, so a good floor does not have to be torn out because of a few bad spots.
Repair starts with finding out why the damage happened. A stain may be a one-time spill or a slow leak that is still active, a loose board may be a fastener problem or a sign of movement underneath, and a line of small holes may be old nails or wood-boring insects. Fixing the symptom without the cause means paying for the same repair twice.
Once the cause is settled, we match the replacement wood to your existing species, width, thickness and cut, weave it into the floor and blend the finish. The goal is a repair you cannot find later.
Board Damage We Repair
Deep Stains From Pets, Plants And Leaks
Stains that sit only in the finish or the very top of the wood can often be sanded out. Dark black stains from pet urine, a leaking plant pot or water under an appliance usually go deep into the grain and will not sand away. For those, we remove the stained boards and weave in new ones.
Before replacing anything, we check the subfloor under a deep stain. Moisture that soaked through a board may have reached the plywood or board subfloor beneath it, and a new board laid over damp or damaged material will not last.
Cracked, Split And Checked Boards
Boards can crack from impact, split along the grain near fasteners, or show surface checking where the wood dried too fast. Small checks may only need filling and finishing. Boards with cracks that run through or that flex underfoot are cut out and replaced so the damage cannot spread or catch a foot.
Cracking that appears across many boards at once is a different signal. It can mean the floor dried out sharply after water damage or that the boards were installed too dry or too wet for the house, and replacing individual pieces will not stop it until the moisture question is answered.
Dents, Gouges And Deep Scratches
Dropped tools, furniture legs and pet claws can leave damage below the finish. Shallow marks usually come out during sanding. Deep gouges in a heavily used area may call for replacing a board or two, especially on a floor that has already been sanded several times and has little wood left above the tongue.
Compression set is worth mentioning here as well. Boards that were crushed together by swelling can stay slightly narrower once they dry, leaving gaps that look like damage. We explain the difference so you do not pay to replace boards that are sound and only need the gaps addressed.
Movement, Noise And Gaps
Loose Boards And Popping Sounds
Boards that lift, rock or pop when stepped on have usually lost their grip on the subfloor. Old fasteners loosen, glue bonds fail and wood shrinks away from nails over time. We refasten loose boards from the face or from below, depending on access, and set and fill fasteners so they do not show.
On a raised foundation, working from the crawl space is often the cleanest option because nothing has to be driven through the face of the board. Screws placed from below draw the subfloor and flooring together, and the finished surface is left untouched, which matters on a floor you have no plan to sand soon.
Squeaks And Hollow Spots
Squeaks often come from boards rubbing against each other or against a loose nail. A hollow sound under a glue-down floor can mean the adhesive has let go in that area, while a hollow feel over a larger zone may point to the subfloor. We find the source before deciding how to fix it, including from the crawl space on a raised house.
Gaps, Cupping And Crowning
Small seasonal gaps that open and close are normal behavior for wood. Gaps that stay open, boards that cup with raised edges, or boards that crown in the middle point to moisture moving through the floor. We use a moisture meter across the room and under the house, and deal with the moisture source before flattening or replacing boards.
Termite And Insect Damage In Wood Floors
Telling Termite Holes From Nail Holes
Drywood termites push out tiny, hard pellets called frass through small kick-out holes, and those pellets often collect on the floor below. Old face-nail holes usually run in neat lines near board edges with no debris. Powderpost beetles leave small round exit holes with a fine powdery dust instead of pellets.
Why Treatment Comes Before Board Replacement
When we find likely termite evidence, we pause the repair and recommend an inspection by a pest control company. The inspection may lead to tent fumigation or a localized termite treatment, and in real estate transactions it is documented on a Wood Destroying Pests and Organisms Inspection Report. Replacing boards first would only give an active colony new wood.
Rebuilding After Treatment
After treatment, we remove the damaged boards, probe the surrounding wood and subfloor to find where the damage stops, and weave new boards into the sound floor. Damaged subfloor or framing found along the way is repaired before the new boards go down.
Termite damage is often larger than the visible holes suggest, because the insects work inside the board and leave the surface nearly intact. Probing the neighboring boards before ordering material keeps the repair from growing halfway through the job, and it gives you an accurate scope up front.
How Our Hardwood Floor Repair Works
Step 1: Inspect And Find The Cause
We look at the damage, take moisture readings and check the subfloor, and on raised foundations we look at the framing from below. You learn what failed and why before any wood is cut.
If the cause is outside our work, such as a plumbing leak, a drainage problem or an active termite colony, we say so and recommend the right trade first. There is little value in a repair that the same cause will undo.
Step 2: Match The Wood
We identify species, grade, board width, thickness and whether the boards are plainsawn, rift sawn or quartersawn. Matching those details is what keeps a repair from standing out once it is finished.
Step 3: Remove And Weave In New Boards
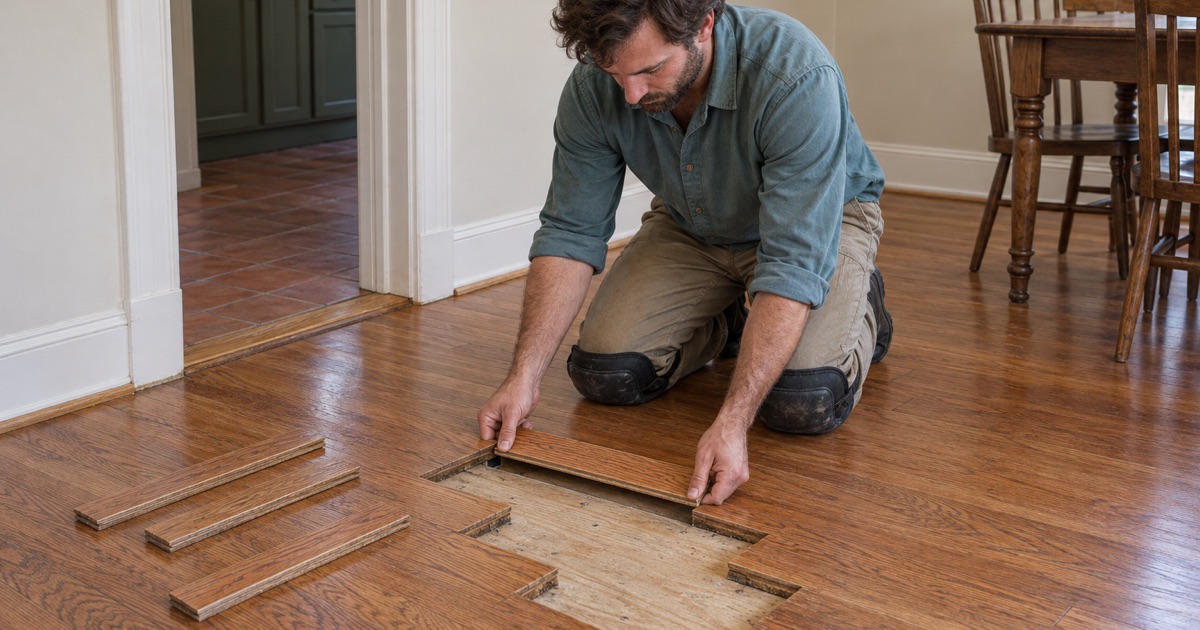
Damaged boards are cut out cleanly so the tongues and grooves of the surrounding boards stay intact. New boards are fitted with staggered end joints that follow the existing pattern, so there is no straight patch outline.
Where the replacement board cannot be slid in from the side, we remove the bottom lip of its groove so it can be set down into place, then glue and fasten it. That method lets us repair a board in the middle of a room without taking up the rows around it.
Step 4: Sand And Blend The Finish
New wood looks different from aged wood until it is sanded and finished with the surrounding floor. Depending on the existing finish and how visible the area is, we blend the repair with spot finishing, a recoat of the room or a full sanding.
Step 5: Written Scope And Photos
Every repair is described in writing with photos taken before and after. That record helps if the damage came from a leak covered by insurance, a rental turnover or a home sale.
- 20+ Years in Wood Flooring
- Free Written Estimates
- Room-by-Room Schedules